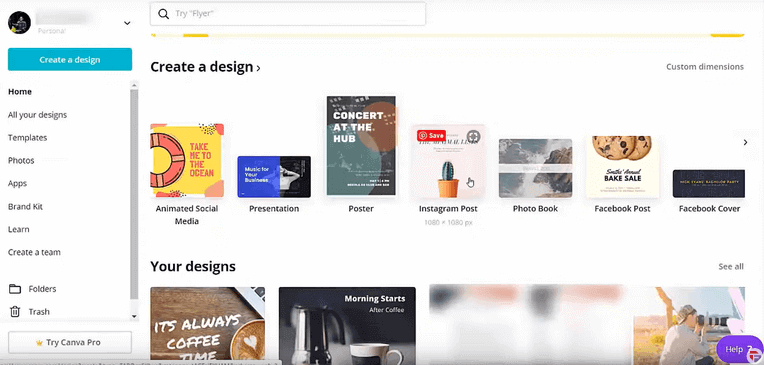
6 Steps to Create A Massive Instagram Following

In our previous lessons, we had talked about how to post content, stories and make use of IGTV to increase your brand awareness. The key to a successful business on Instagram solely lies in its followers. You need to build a huge number of followers to kick-start your sales and business. Here in this chapter, we shall discuss 6 proven ways to create a massive Instagram following.
Let’s get started...
1. Add Multiple Links On Instagram
On Instagram, you can add your website link in your bio. However, you are only allowed to add one link. What if you want to add more than one link to your bio so that users can visit your different websites?
The solution to the predicament lies in using Linktree. Linktree has gained popularity over the years as it has enabled Instagram users to add more than one link in your bio.
Here’s how you can use Linktree on your Instagram:
- Visit the website https://www.linktr.ee.
- Sign Up Using Instagram.
- Authorize Linktree to access your basic profile info.
- Select 3 categories that suit your Linktree account.
- Choose a Free plan.
- Click on Add New Link on your home page of Linktree.
- Add the title and links to your various social media platforms. Do not add too many links as users will have to scroll to view the links. It's distracting too.
- Copy your Linktree URL
- Edit your Instagram bio. Remove any existing website link and paste the Linktree URL you just copied.
You’re all set. You have successfully added multiple links to your Instagram bio. Use Linktree to add links to all your social media platforms using just one link. This will help you drive traffic to your website.
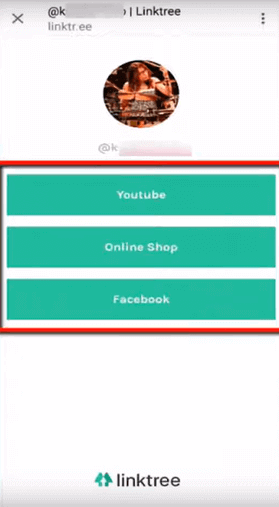
When any visitor clicks on the link in your Instagram bio, they will be redirected to a page within Instagram. On the webpage, they will view the button links to the website we had added on Linktree.
This way your followers can reach out to you on different platforms directly through your profile. This is hassle-free for your followers/visitors and they will certainly appreciate you for saving them the effort.
2. Use different websites to get photos for your Instagram
To maximize your engagement and reach, you need to make posts very often. Your uploaded photos must have a common theme to maintain some similarity in the aesthetic in your Instagram profile.
You must always post high-quality content. Sometimes it can get difficult for you to find good photos if you are not a photographer with pro skills. In such cases, websites that offer royalty-free photos to use for commercial purposes come to your rescue.
Let us take an example of a website https://pixabay.com/
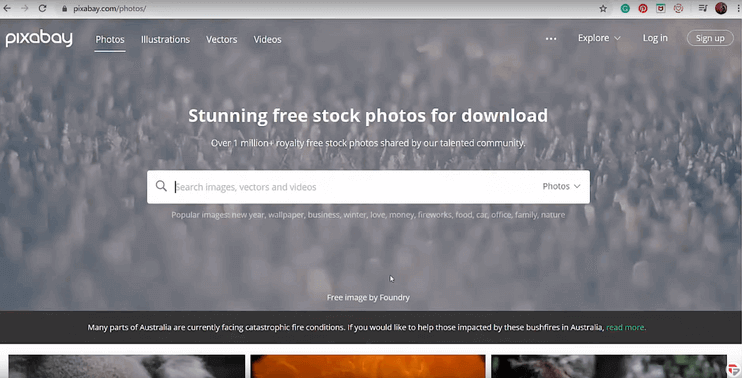
You can choose among the options to browse and download photos, illustrations, vectors, and videos.
Vectors are the files that can also be edited in image-editing software like Photoshop.
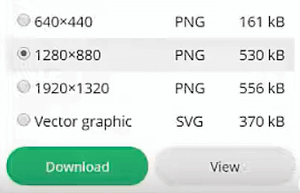
You can download the images in different resolutions depending on your requirements. We recommend that for Instagram you use the highest quality image.
In addition to images, Pixabay also allows users to download short videos for your profile. The quality of the videos varies and can be up to 4K in some videos.
Use the search bar to look for any particular video. When you place your mouse cursor, you’ll be able to get a preview of the video.
Under the Explore section, you can view popular videos, images, vectors, and illustrations. You can also look for photos by a particular photographer.
There are plenty of websites that offer royalty-free photos. Some of them are listed below:
- Pexels.com
- Unsplash.com
- Dreamstime.com
- Stocksnap.io
Use these websites to the fullest to create aesthetically appealing posts to your viewer without even hiring any professional photographer.
3. Create Customized photos for your Instagram
Instagram photos must be high-quality images and must be able to grasp the attention of the viewer instantly. If at all you run short of having good quality images for your Instagram, you already know how to find royalty-free photos that you can use in your profile. You can further optimize these downloaded photos by adding your customized texts and designs.
One such tool, Canva offers great customization for your photos. Just sign up using google or your Facebook page and you’re good to go.
Choose from several custom dimensions templates available in Canva. As you place your mouse cursor over the image, you will be able to see the dimensions of the design. For an Instagram post , the default dimensions are 1080 x 1080px.
Let us select this design and proceed further.
A new web page opens. On the left side, you can view the recently used images. Click the + icon to add a new page with the same design.
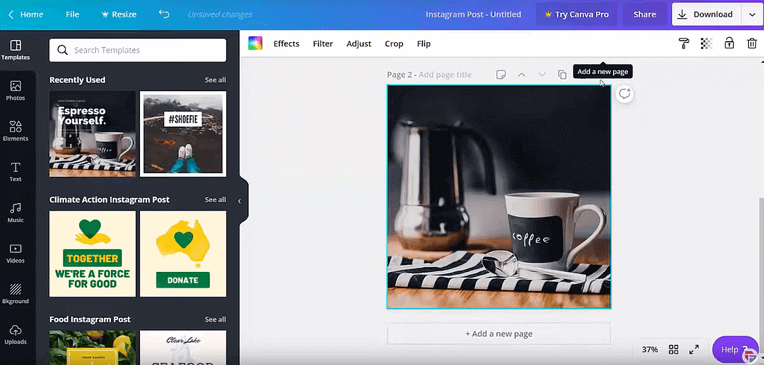
On the left side of the page, there is a template menu. Select the template for your post. From a list of hundreds of templates, choose one that suits your profile.
You shall have to pay $1 to remove a watermark in some templates and images. If you don’t want to spend a buck, then select a template that is for free and without a watermark.
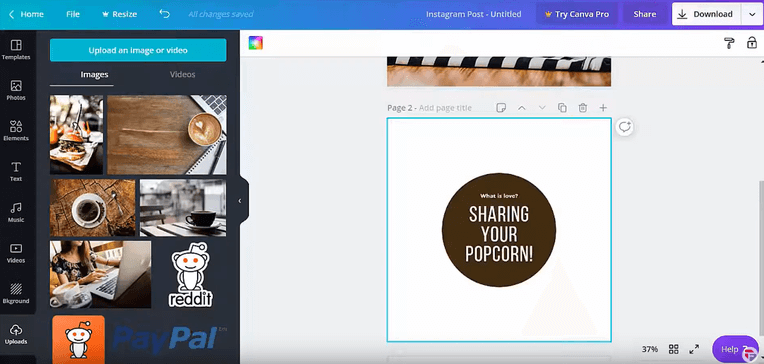
You can upload new photos, or choose from the ones you have uploaded already.
You can enhance your photo by using a vast number of tools. You can change the transparency of the elements you have used in the image.
You can change the fonts style, font size, color, make it bold or italic or underline and much more. You may also adjust letter-spacing and line-height.
Make use of your creativity and all these tools to design the best-customized photos for your Instagram.
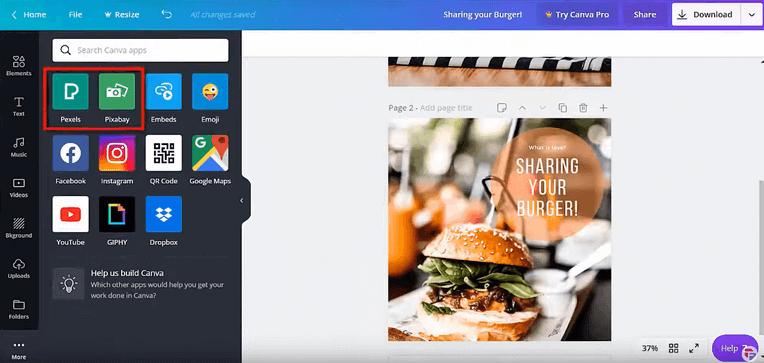
In the more section, you can browse Pexels and Pixabay to look for more images that you can use to customize your Instagram posts.
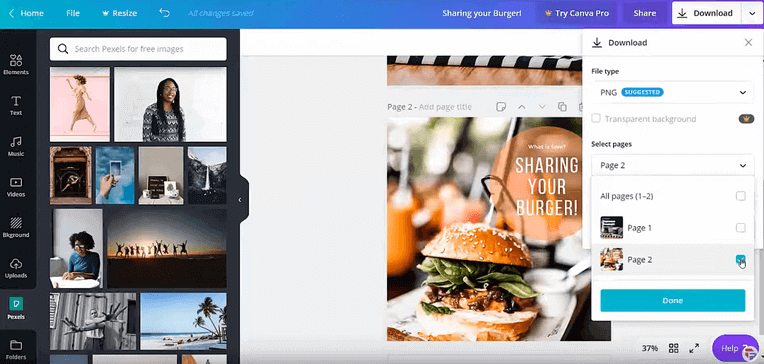
After all the editing, click on the Download button. Select the page number that you want to download.
Bingo! You can now use this customized photo on your Instagram for your business.
4. Schedule Content Post on Instagram
You must post consistently on your profile. However, you don’t need to worry about having to post manually if you have your content planned already. There are numerous websites that you can use which help in automating the posts and scheduling them well ahead of time.
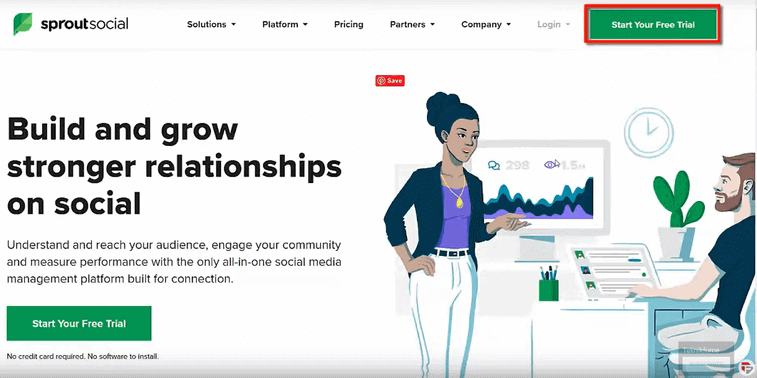
Let us take one example of a planning tool - Sproutsocial
Click on Start Your Free Trial. Fill in your details and create an account. Connect your profiles and Authorize access.
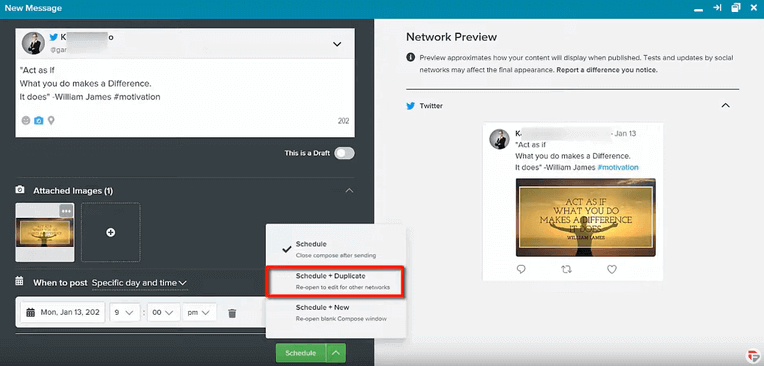
Click Compose. Add your content and images/videos. Schedule for a particular date and time.
Click on Schedule+Duplicate as this option allows you to post content to other social media platforms as well.
Let us learn about the options on the menu.
The Feed allows you to view your social media content post.
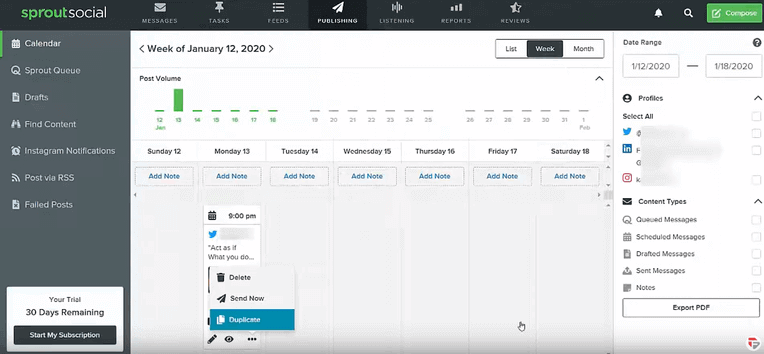
Publishing shows a calendar view of your scheduled posts.
Click the date on which you have scheduled the post. Click the three dots menu at the bottom and duplicate.
Select the profile. Then choose the platform for which you want to schedule.
Choose a date and time and then click on Schedule.
Congratulations!! You have successfully scheduled posts for Instagram.
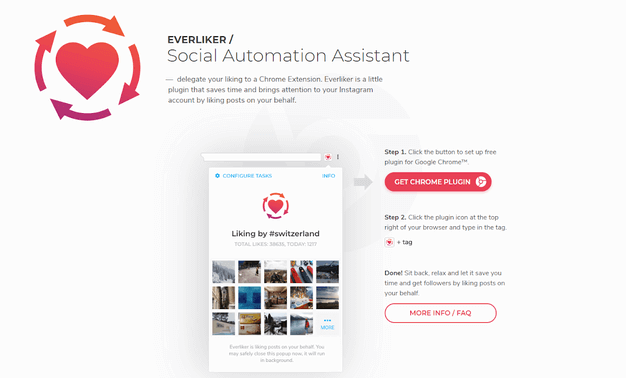
5. Use Everliker to grow your Instagram
Everliker is a google chrome extension that allows you to automatically like other people’s posts that have used specific hashtags.
Visit the website https://everliker.com/
It is a plugin for google chrome. So you must be on Google Chrome to use it.
Click on Get Chrome Plugin.
You will be redirected to the Chrome extension download page. Add the extension to your browser.
After adding the extension to your browser, you will see the Everliker icon in the bar.
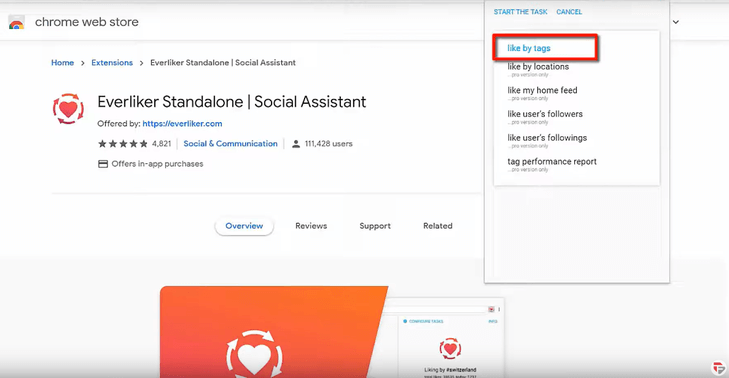
Click on the icon. Choose your task type. You can select various types by clicking on the drop-down arrow.
You have the following options:
- Like by tags
- Like by locations
- Like by home feed
- Like user’s followers
- Like user’s following
- Tag performance report
Since we are on a free version now, we can only use the first option Like by tags.
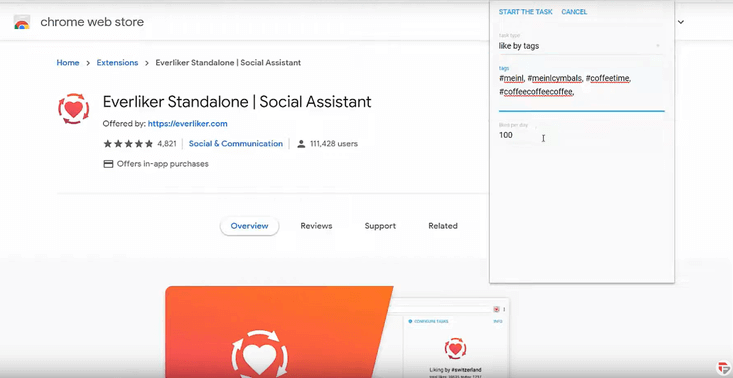
Select the tags that you want Everliker to like from your account.
Select how many numbers of posts you want to like per day. Initially, start with 100 and gradually take it to 400. This way Instagram won’t take you as a spammer and block you.
All the hashtags you include in your lists, Everliker will like them automatically. If you are using the pro-version, you can even follow the user who uses the hashtag in their posts.
Everliker saves you a lot of time by automatically doing the work of searching the people and liking their posts. In this way, you save a lot of manual efforts.
If you like the free version, you will love the pro version. Moreover, it only costs $5 and is worth every single penny.
6. Instagram Hashtags Finder
In the previous lessons, we explained to you how important it is to use hashtags in your posts. Hashtags increase your reach by a large proportion and bring to your higher engagements with your posts.
Here, we shall talk about how to find the right hashtags for your brand.
Let us take an example of dailypurpose.com.
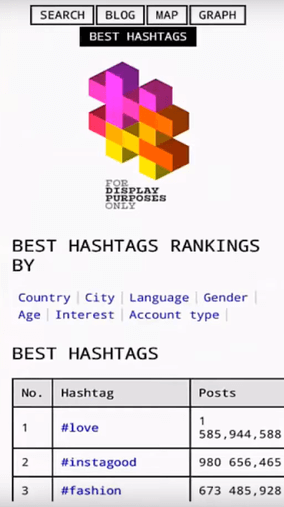
Visit the website https://displaypurposes.com/.
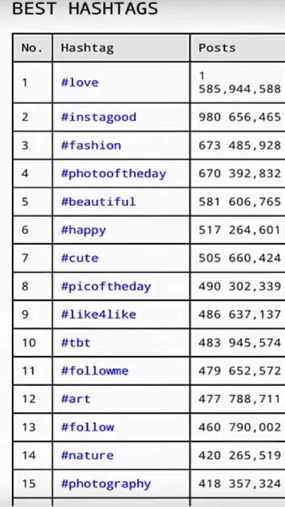
This website will help us to work out the popular hashtags that we can use in our posts. It recommends people highly popular hashtags and even relatively less popular hashtags and also allows you to filter those based on country, gender, etc.

Click on the search box and type the keyword related to your business. You can use your product category as a keyword. For example, if you have a coffee shop, search hashtags using the keyword coffee. You will see a list of popular hashtags that are related to the keyword.
Do not always go for the most popular hashtags on Instagram. When you use these popular hashtags, there could chances that other businesses would be using the same hashtags too. When this happens, your post might not be visible on the top of users’ feed. Hence, to avoid this make sure that you use a mix of very popular and lesser popular hashtags in your posts.
You can view the ranking of the best hashtags. You can filter your hashtags. Figure out your target audience and then reach out to them using specific hashtags.
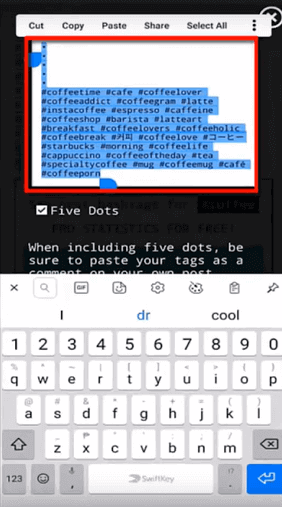
Click on the Copy Mode button. Copy this section.
Go to your Instagram mobile app. Post your content. In the comment section, paste the content that you copied.
That’s it! You have successfully found the right hashtags and used them.
Conclusion
Hope this brief lesson on how to make sales on Instagram has enthused you to start working on your Instagram business. In the next few chapters, we shall teach how to obtain massive following on Instagram. Helping you discover how you can use Instagram to grow your business online.
Chapter 11: Using Instagram Ads See More