How to use Twitter Moments Correctly
Hello Folks, in this lesson we will talk about Creating Twitter Moments. Twitter moments are a group of Collected tweets. They are collected under a twitter moment name.
It’s a feature that marketers can take advantage of in their businesses.
When they originally launched, Moments were intended to help Twitter users keep up with what the world is talking about at any given time without having to follow loads of new people or watch trending topics closely.
Moments have already been used by a wide range of brands, individuals, and groups.
Anyone on twitter can view your Twitter Moments even if they don’t follow you or you don’t follow them
People who check out your twitter moments can see a list of moments that you have collected over time and they can learn more about certain topics.
You can create Twitter moments from a trending Hashtag.
If you check out your menu, you will be able to view your top twenty trends in your location. You may notice there are tons of tweets from users who are posting tweets with such keywords.
While these hashtags and keywords are trending, you can use it to your advantage as tons of people are using that hashtag by the time it appears in your explore menu.
You can curate a twitter moment with top tweets relevant to that trending hashtag. These can be tweets that you have gathered where people can learn something from.
Doing this will let people browse tweets that are relevant and are not considered spam-like some tweets that you see in your search results.
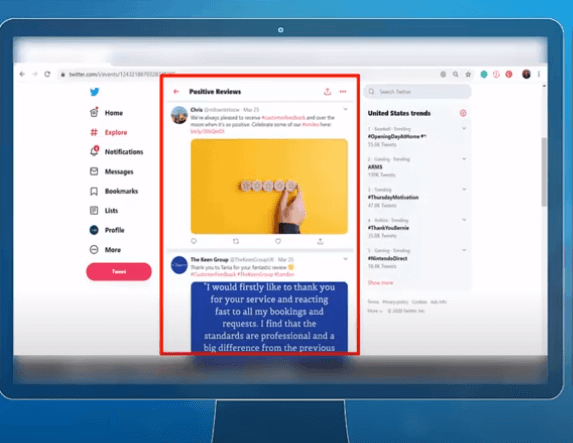
Twitter moments to create a collection of positive reviews from your customers.
People who are not yet aware of your products can stumble upon your twitter account and if they are curious, they can view your Twitter moments.
This group of positive reviews will create a good impression on your brand or your business.
When you feature your customers’ input, you’ll not only show that you’re listening to their ideas, you’ll also help them feel part of your brand family.
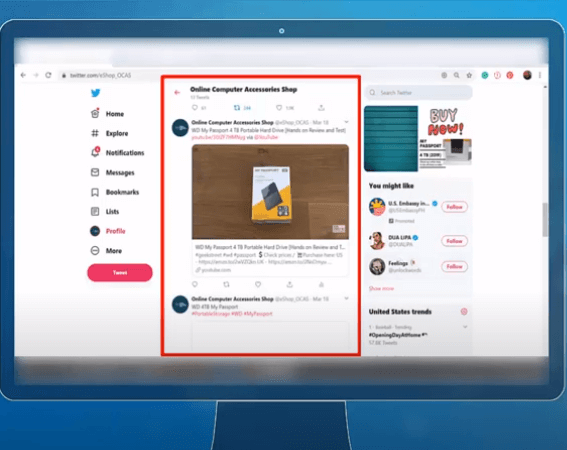
Share video, GIFs, images, infographics, and Tweets to share details of your product from different perspectives. When you create a Twitter Moment with all your product’s content, it’s easy for customers to gather information all in one place.
Who doesn’t love a shout out?
When you feature your customers’ input, you’ll not only show that you’re listening to their ideas, you’ll also help them feel part of your brand family.
People will easily start trusting your brand.
As soon as they like your products or your services, your potential customers who stumble upon this moment will see your brand as a business they can trust.
Demos and launches are mostly followed up with videos, new posts, blogs, and vlogs promoting it online.
Once they’ve seen videos or demo products, that is also an advantage to your business.
Social media platforms are seen with content related to the launch in numerous forms in multiple channels. All of these can be collected and put in a single frame with Twitter Moments.
Conclusion
When they see that your products are useful and have helped tons of people then they are more likely to take their time in researching more about what your product can do.
People can learn more about your brand and can even create an emotional bond with your audience since they develop a feeling of being close to your brand or business.
And they have experienced a short moment of knowing your brand or your business. This even shows that you are a reputable brand.
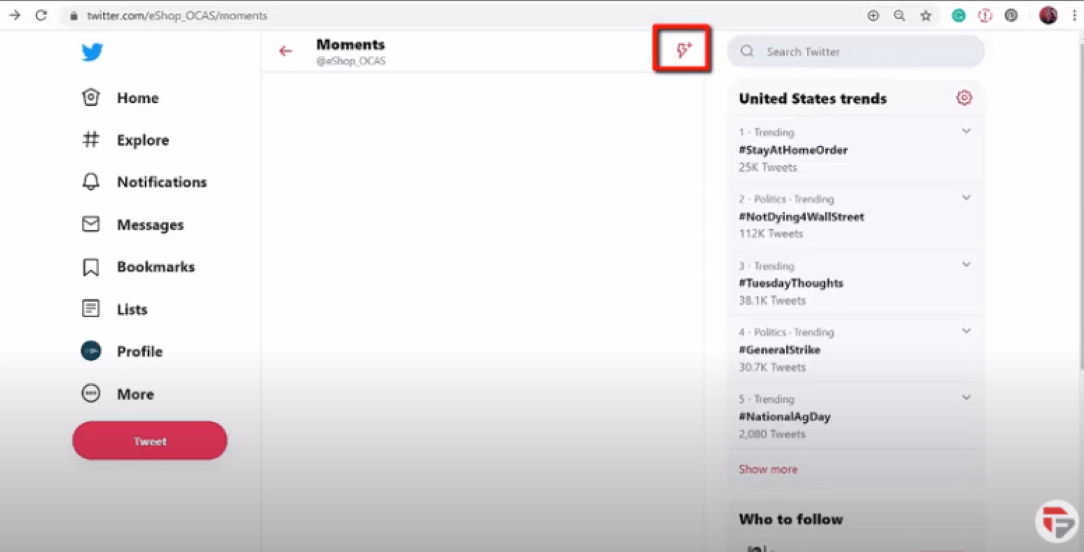
How to Create a Moment
There are three ways to begin creating your Moment via twitter.com. You can access Moments through the Moments tab, your Profile page, or through a Tweet detail.
To get started all you need is a title, description, Tweets, and a selected cover image.
It’s very easy to add a Twitter Moment, it requires a few built-in steps, which I am going to show you now.
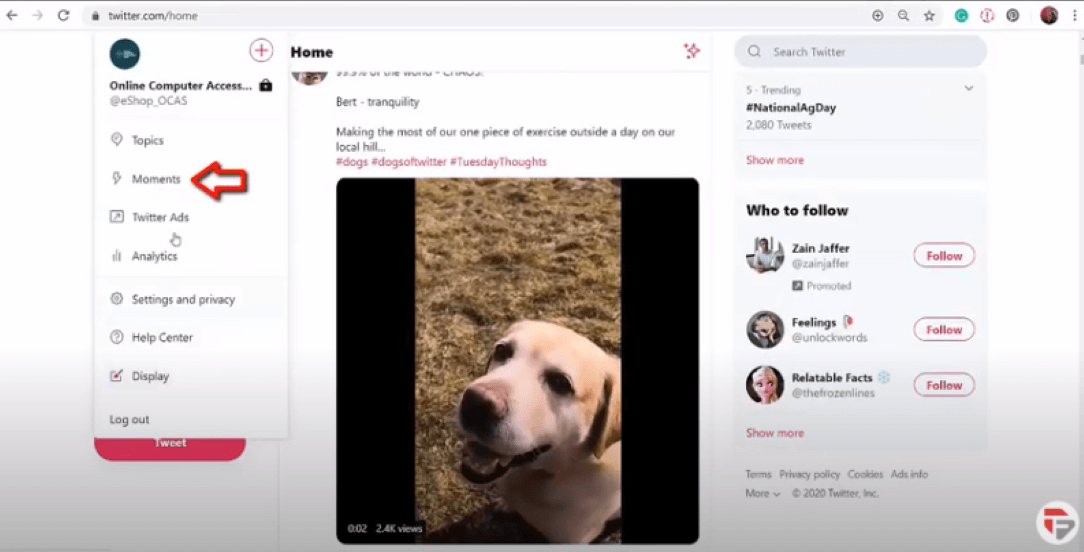
- Got to your Twitter Profile
- From the Left Menu, Click More
- Click Moments
- If you haven’t created any moments earlier, your page will be empty.
- Click the Lightning Icon
You will be redirected to a page where you have to fill all the details to create your moment.
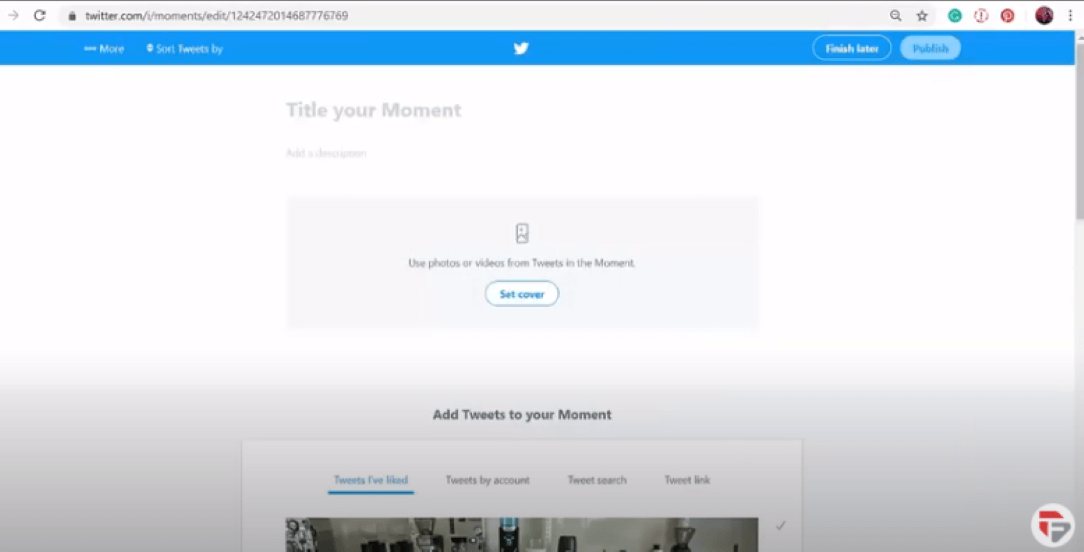
- Click the Title of your Moment field to give your Moment a name.
- Click the Add a description field to type in a description for your moment.
- Click Set cover to choose a cover image from one of your selected Tweets or upload an image from your computer.
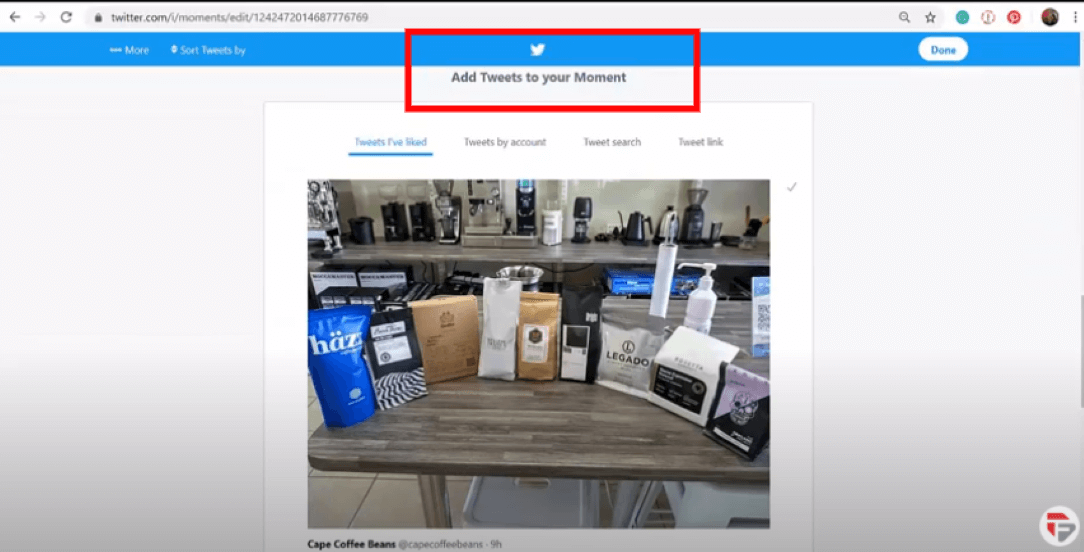
- From the Add Tweets to your Moment section at the bottom of the page, quickly access content to select Tweets from
→ Tweets I’ve liked
→ Tweets by account
→ Tweet link
→ Tweet search prompts
- To add a Tweet to your Moment, click on the checkmark icon
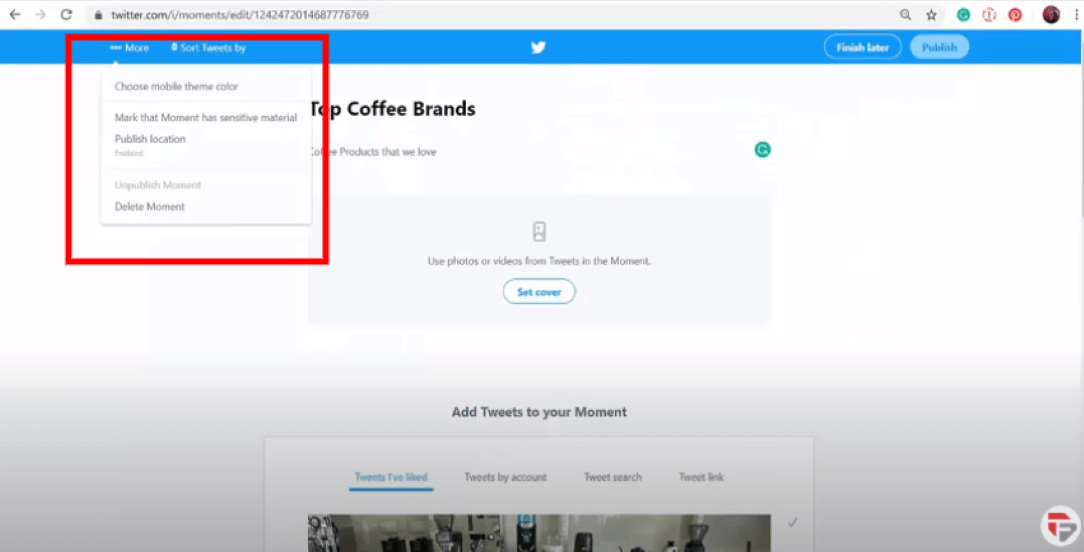
More options while creating a Moment:
From the More menu at the top of the page:
- Click on More while in draft mode.
- Select Choose mobile theme color if you’d like to apply one.
- Mark that Moment contains sensitive material, if appropriate.
- Select Share Moment privately to copy and paste your Moment’s URL to share privately with others.
- The Moment will only be visible to people who have the URL, it will not be visible on your profile page, or published on Twitter.
- Select Unpublish Moment to unpublish a Moment you have previously published.
- Select Delete Moment to permanently remove the Moment from your profile and Twitter. You will see a confirmation pop-up message to confirm the deletion.
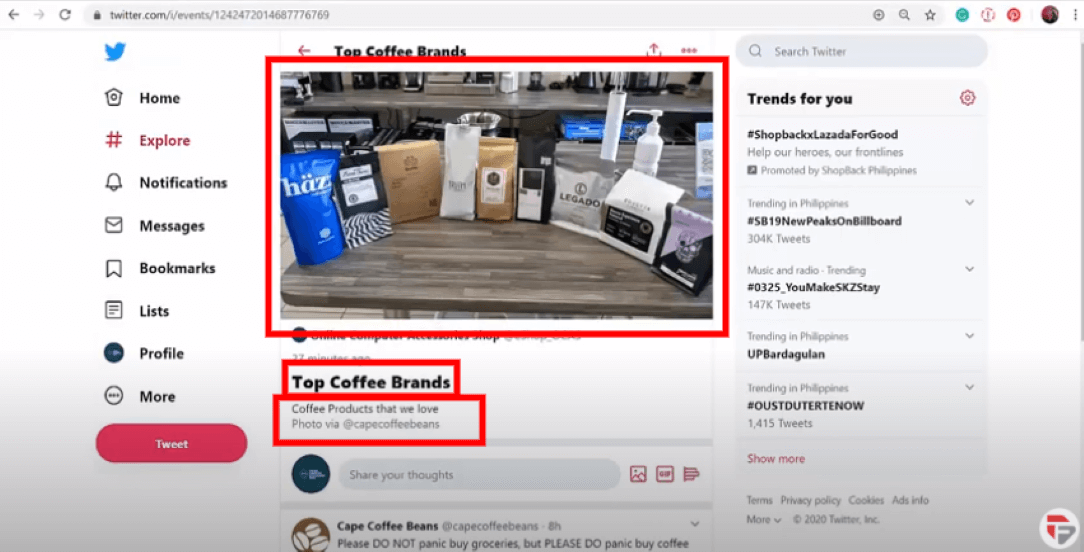
Below is an example of a Twitter moment with
- Cover Photo
- Twitter Title
- Description
- The owner of the cover
Let’s add more Tweets on our twitter moment
- Browse for a tweet that you would like to add
- Copy the tweet’s link
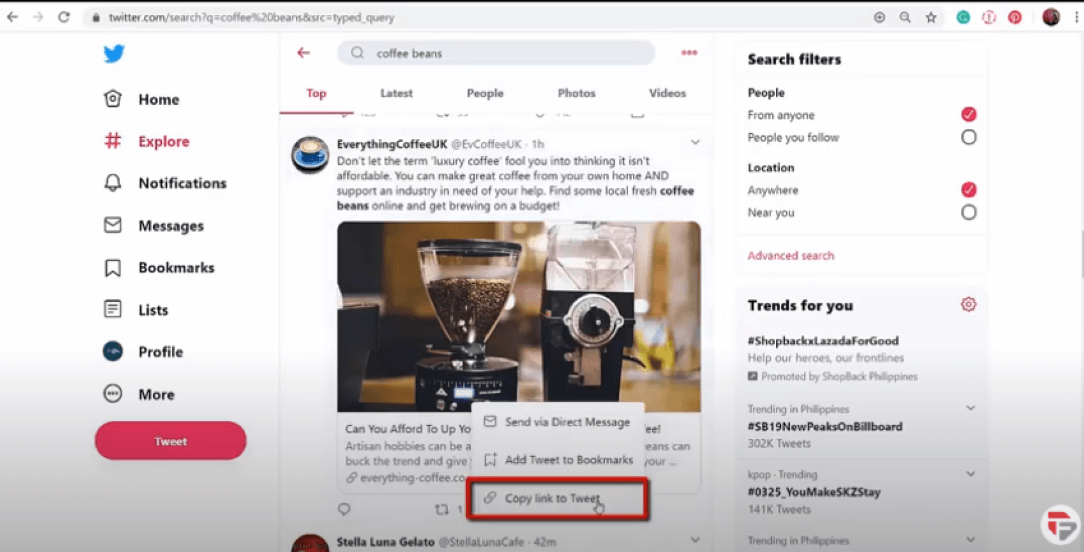
- Click more than select moments
- Click on the moment that you have created
- Click the three dots and choose edit
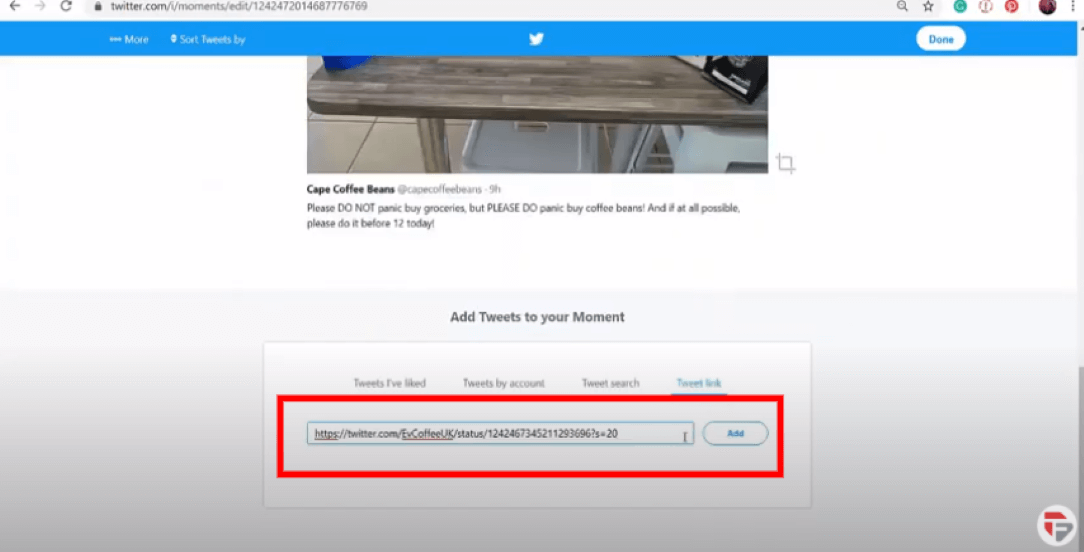
- Scroll down and under Add Tweets to your moment
- Click Tweet link
- Add the tweet link here
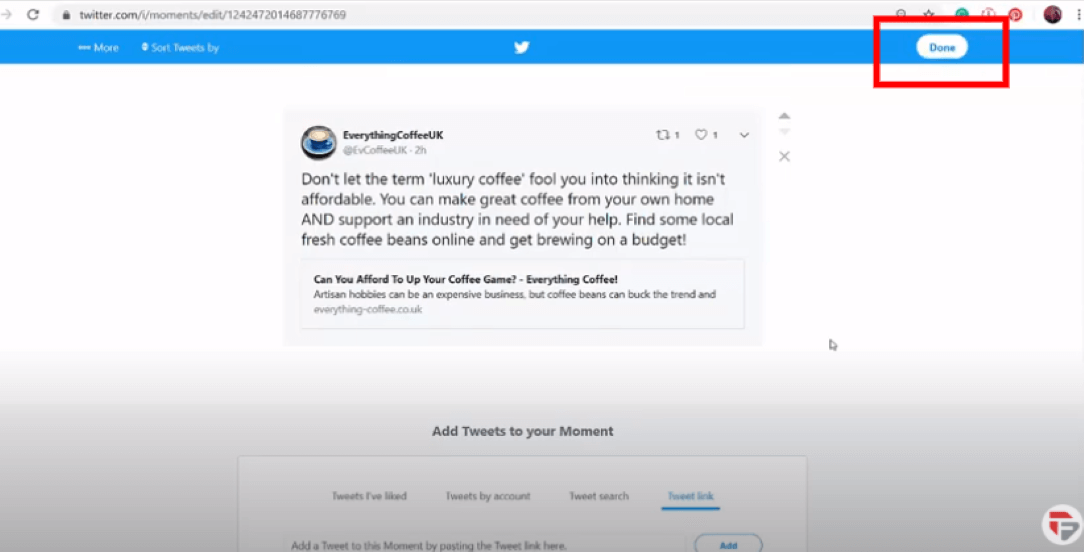
- Click done
Moments created by Other Twitter Users
You can view moments created by other twitter users
- Go to there profile
- Click the three dots beside the message icon
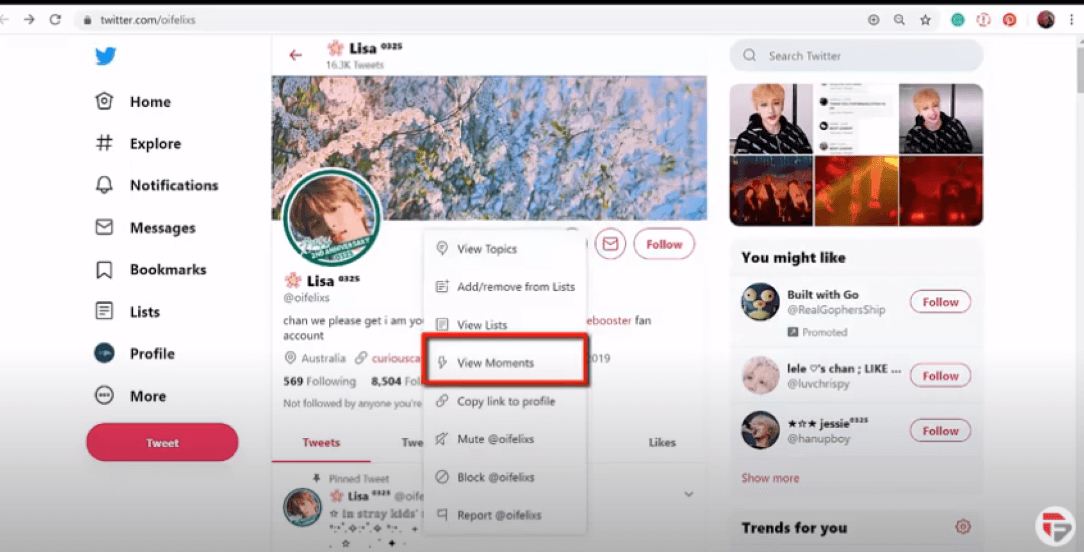
- Click on View Moments
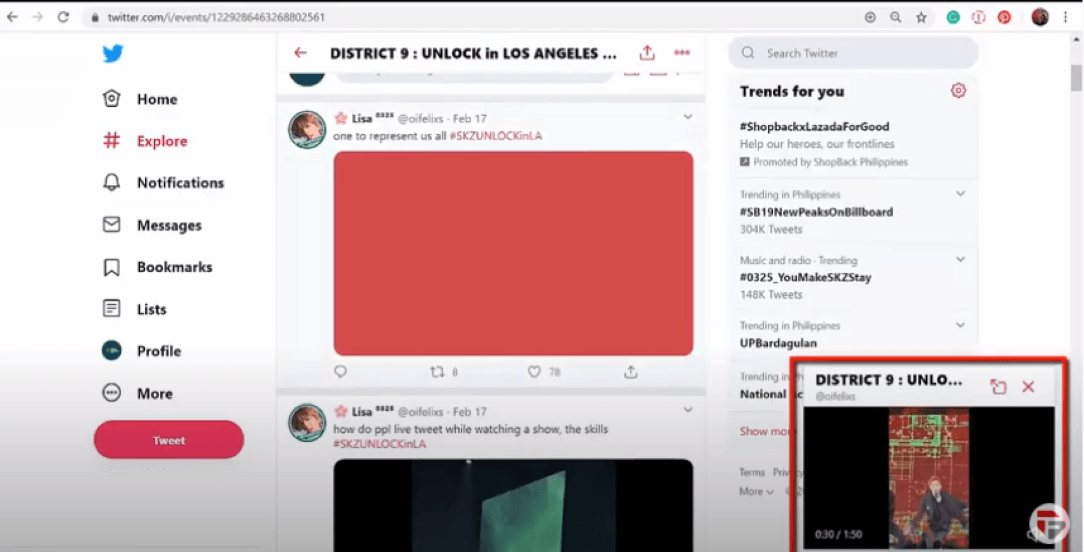
- You can view all the moments shared by the user
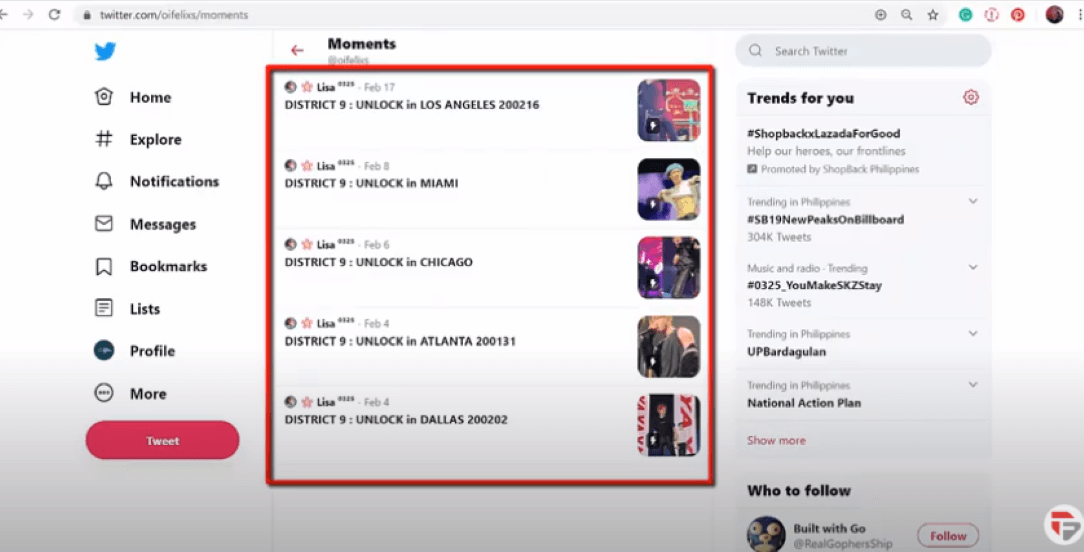
- They have shared a video as their cover post when you scroll down the video will not pause. It will continue to play.
Hope this topic was useful. We will now proceed to our next topic: How to limit access to your account and tweets.
How to limit access to your Account and Tweets
The world’s most active social network platform brings all kinds of people: stars, politicians, journalists, IT experts, and just sociable types.
Alas, like any other big Internet community, Twitter is not immune to bots, troublemakers, spammers, and even scammers.
Remember
Once you sign up for an account on Twitter, your tweets are set to public by default.
When you use Twitter to post tweets, you are letting everyone see your tweets even if they don’t have a Twitter account.
As long as they have access to the internet they can view your profile and can see your tweets.
Users of the social network can also retweet your posts as they please.
Especially if you have built your Twitter profile for a very long time and you have tons of followers.
Once you click on the tweet button, your tweet can be seen by anyone who lands on your profile or tweets by using the search text box.
Privacy Settings: Hiding from Spammers and Haters
Twitter lets you choose what others can see and do on your page. This protects you from unwanted messages and tweets.
You can set your account to private. Doing this will protect your tweets from being seen by anyone on Twitter who is not following you.
You’ll find most (but not all) privacy settings under Privacy and safety.
To protect your tweets, open the Twitter Settings menu,
- Click the “Security and Privacy” option.
- Click the “Protect My Tweets” checkbox near the bottom of the page
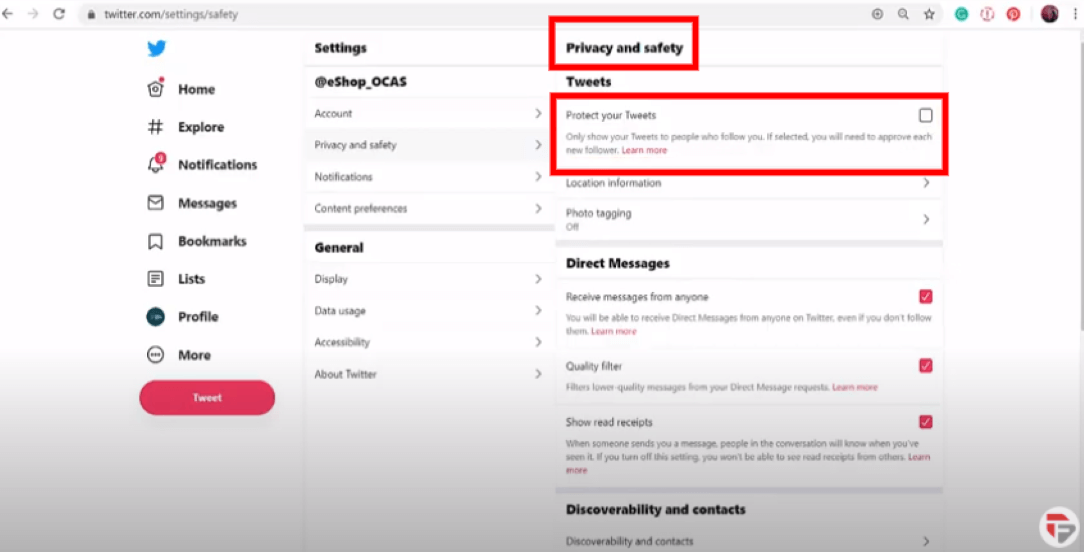
- Click “Save”
All of your posts, including those already published, will become invisible to non-followers. But followers will still be able to read them.
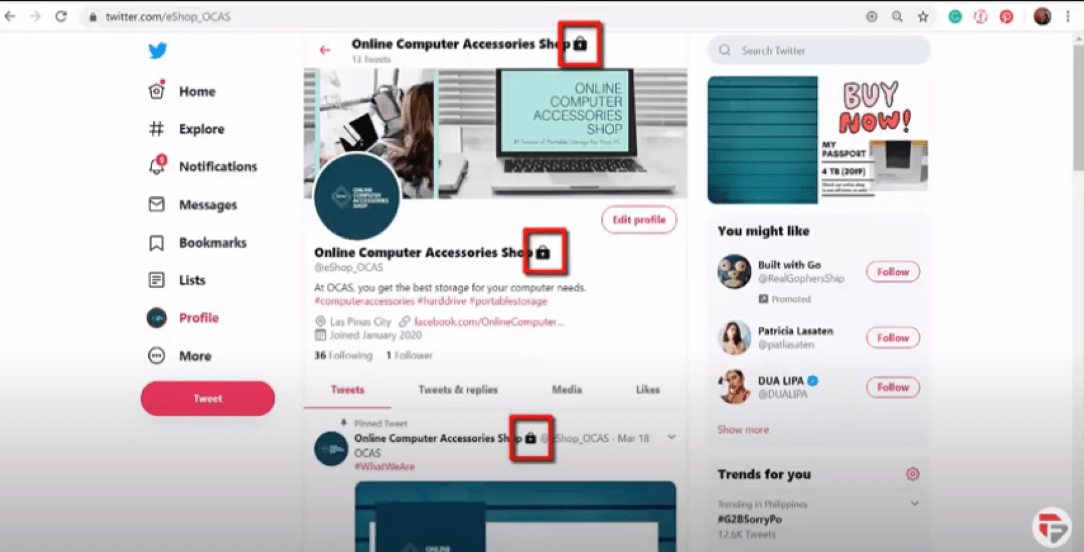
When you’ll check your profile, you will see a lock icon at the end of your twitter name. This indicates your profile is protected now!
If you have posted tweets for a long time and later decide on setting your tweets private.
Tweets that are posted before you set your account to private will no longer be accessed by anyone on twitter. Only your followers will be able to see your tweets on their feed.
What happens when you limit access to your Tweets?
When you limit access to your tweets you will receive requests from people who want to follow you.
You can manually approve and select who can see your Tweets.
It’s better to check the twitter profile of the people who ask your permission to follow your account before accepting them.
See if they have an optimized profile account with a profile picture, good bio, and browse their tweets.
Check if they just keep on sharing tweets and not posting quality tweets.
Also, if their tweets are always full of rants then you don’t want to add that user to your followers.
They could spread Negative Vibes to your feed.
The retweet function is disabled on Tweets you post, so anything you post remains entirely within your account.
Your followers are NOT able to share your content, they can only favorite it. You are still able to retweet other public users though.
Protected Tweets do not appear in search engines like Google and third-party sites, like Favstar, are not able to archive them.
Protected Tweets are only searchable by you, the owner of the Twitter account, and your followers. Previously posted public Tweets will still be searchable in Google.
Remember
When you share a link and your tweets are protected, then your tweet will use a short link (t.co)
But you have to remember that your followers, who see your protected tweets with that (t.co) link, will still be able to copy and share the link to anyone.
Anyone who has access to that link will be able to view the content in the link.
Hope this lesson was useful, we will now proceed to the next chapter i.e, Connecting with influencers on Twitter
Chapter 6 : Connecting with Influencers & Using trends for twitter marketing See More