Using WhatsApp Web- A Step By Step Guide To WhatsApp Web

WhatsApp Web was launched in 2015, and there has been a significant increase in the number of users accessing WhatsApp through their computer. It was designed keeping in mind the people working on their computers/laptops who do not want to look at their phones every time they receive a message on WhatsApp. More and more users today have started using WhatsApp Web. For the people who have recently begun using it, this is a lesson where we will explain how to use WhatsApp Web. We will also explain how to compose messages, send photos/images, contacts, documents, etc. Let’s get you started.
WhatsApp Web can mirror the conversations in your WhatsApp Mobile app. Since WhatsApp uses a unique QR code to verify your account, using the web client is secure. WhatsApp Web makes it easier to respond to your customers’ inquiries since you will be using the computer's keyboard to type in your response. Typing a message using a keyboard is faster and more convenient than touch-screen typing. The web client is helpful when you receive hundreds of messages every day from different people. You can type faster using the computer’s keyboard and can view the list of messages received on WhatsApp on the large screen of your computer.
WhatsApp is intended to be used on your mobile phone. Once you create a WhatsApp account, you can also activate WhatsApp Web for your account using a web browser.
Before you can use WhatsApp Web, you need to activate it to mirror your messages. The activation is only a one-time process. You won’t have to worry about scanning QR code every time you need to use WhatsApp Web.
Let us show you how to use WhatsApp Web.

Visit web.WhatsApp.com on your laptop.
Simultaneously, open WhatsApp on your phone.
Open the menu on the top right corner of the screen. Tap on WhatsApp Web.

The URL that you entered in your browser will open a webpage that displays instructions on how to use WhatsApp Web.
On the next screen on your phone, WhatsApp provides a short animation on how to scan QR code. Tap on Ok, Got it.

The code scanner on your phone will start running. Point your phone towards the QR code displayed on the web browser. As you scan the QR code using the phone, WhatsApp Web will be activated in the browser.
The code refreshes in every few seconds for security purposes. Enable the checkbox to keep yourself logged in on this browser permanently. You won’t have to scan the QR next time you have to use WhatsApp on this browser.

WhatsApp will display the notification on your phone to inform you that WhatsApp Web is active on your computer.

For WhatsApp Web to work, you need to make sure that your mobile phone is always connected to the internet. If your phone’s internet connection is interrupted, WhatsApp will immediately display a notification in the browser prompting you to check the internet connection.

You can view your contacts’ status on your browser.

To compose a message, click on the message icon. You can record a message, send text, emojis, and GIFs.

To send audio messages on WhatsApp, click on the mic button. You will have to grant WhatsApp permission to use your microphone. As you click on the icon in a chat, WhatsApp will start recording your messages using your laptop’s mic.
Click on Allow.

As the recording starts, the duration of the recording will be displayed. Click on the check button to send the recording. If you need to cancel the recording, click on the cross icon.

As soon as the message is sent, a pop-up notification will be shown on your phone’s screen.

You can send media to your contacts in WhatsApp Web too. You can send photos,videos, documents, and contacts.
Click on the clip icon on the top of the page to send various files.

Select the photo saved on your computer to send it on WhatsApp Web.

Add a caption to the photo. Click on the send button.
You can add more photos by clicking on the Add File button.

A photo from your computer has been sent to your customer using WhatsApp Web.
Similarly, you can send contacts, documents, etc.

While sending documents on WhatsApp Web, you cannot add a caption to it.

You can send your WhatsApp contacts to one of your recipients using WhatsApp Web too. Note that you can only share the contacts that are saved in your WhatsApp contact list.

WhatsApp Web provides tons of other features like viewing contact info, reporting business, blocking, muting notifications, etc.
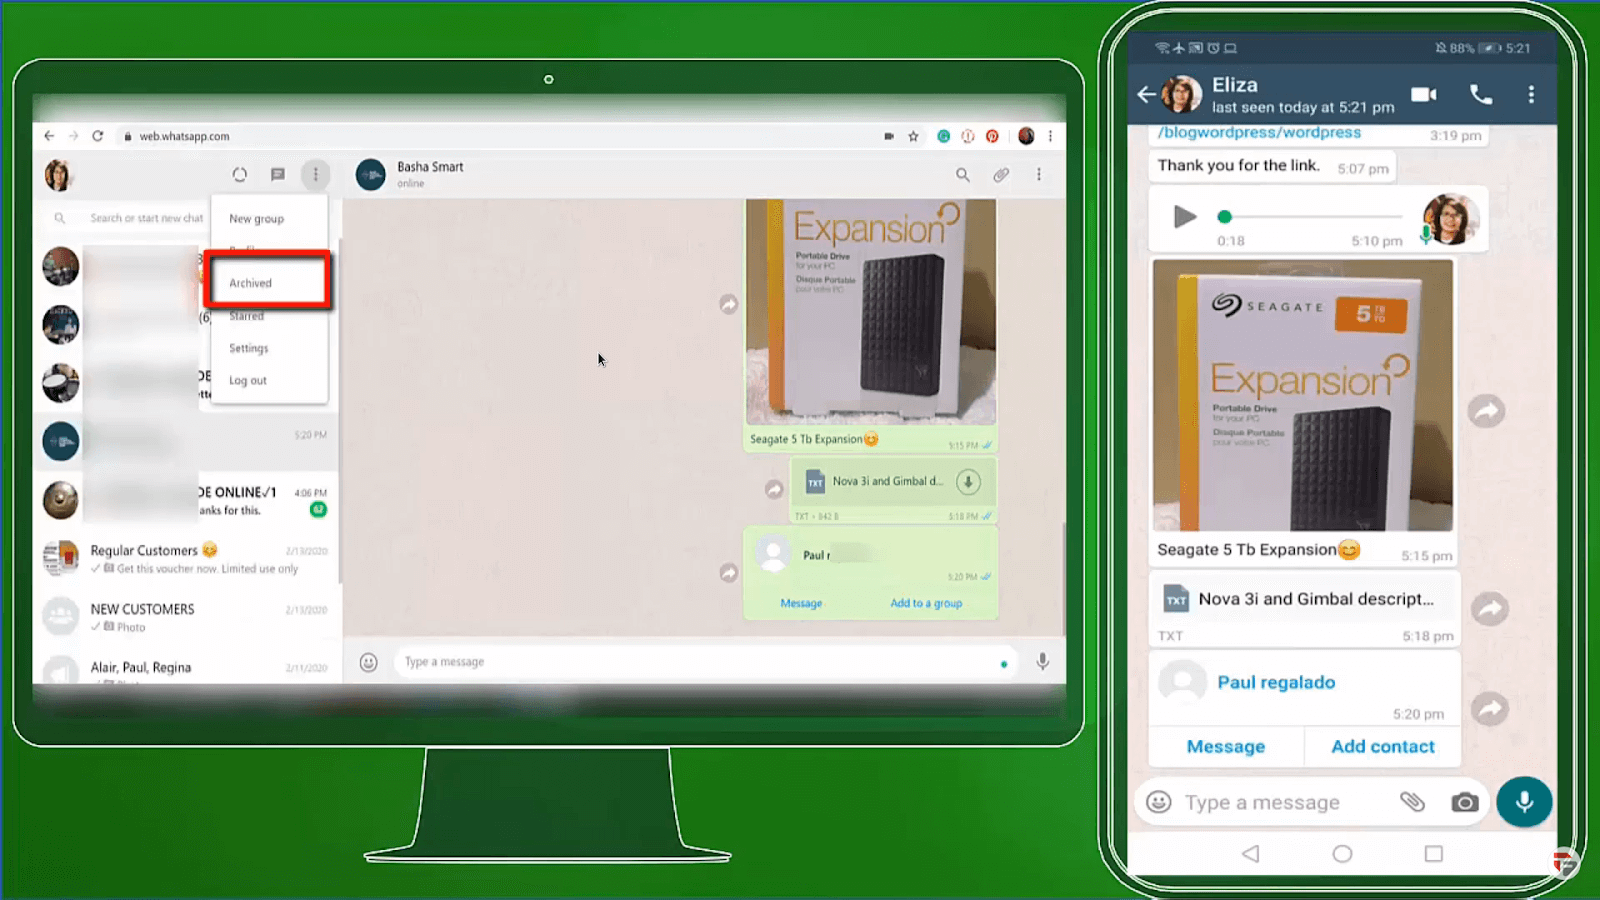
On the top-left corner of the page, you can view other features of WhatsApp that are also available on the WhatsApp mobile app. WhatsApp Web allows you to create a new group, manage your profile, view archived messages, view starred messages, manage settings, and log out.
If you need to look for any contact, or any particular message, use the search bar.
On WhatsApp Web, the Settings menu has only limited features, namely, managing notifications, changing chat wallpaper, and viewing blocked contacts.
That’s it! This is all we need to learn about activating WhatsApp Web and using it after that.
WhatsApp Web As A Marketing Tool

Previously we have learned about how to activate WhatsApp Web in a web browser. If you enabled the checkbox while scanning the QR code, you would not need to activate WhatsApp Web next time you use it.
Now we will explain how to use it as a marketing tool for your business. WhatsApp Web is a great tool that you can use once you have registered a number, be it a landline number or a mobile number belonging to a WhatsApp Business Account.
Use WhatsApp Web to respond to your contacts quickly. You can easily type in your response to any of your contacts’ inquiries about your products or services.
For a busy person working mostly using their computer, it seems a burden having to check the phone for viewing and responding to messages.
With your computer’s keyboard, you can type much faster as compared to using the touchscreen keyboard on your phone. If your files are already stored on your computer, you can send media to your customers effortlessly. You wouldn’t need to connect your phone to your computer repeatedly to transfer files. Think about all the time you will save!!!
#1 Creating A Group
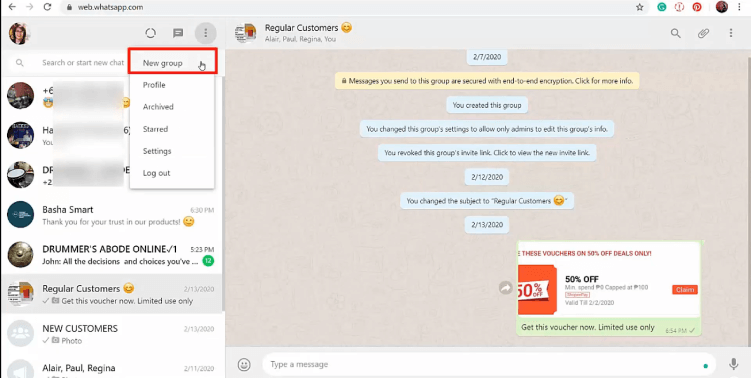
To create a group on WhatsApp Web, click on New Group.
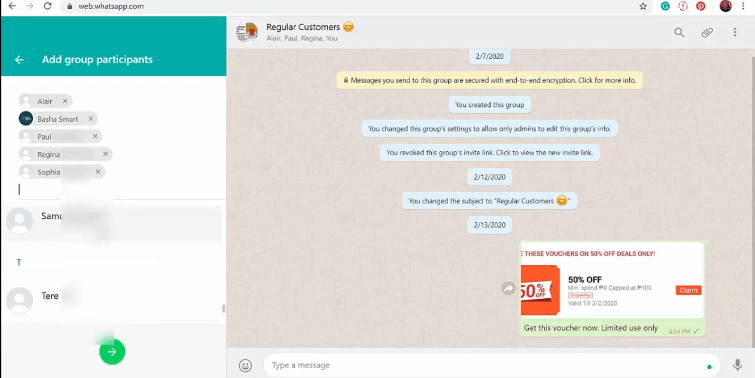
Select the contacts that you want to add to the group. You can access here all your WhatsApp contacts that are on your phone.
Note that you can only add up to 256 people in a group.
To remove any selected contact, click on the X icon.
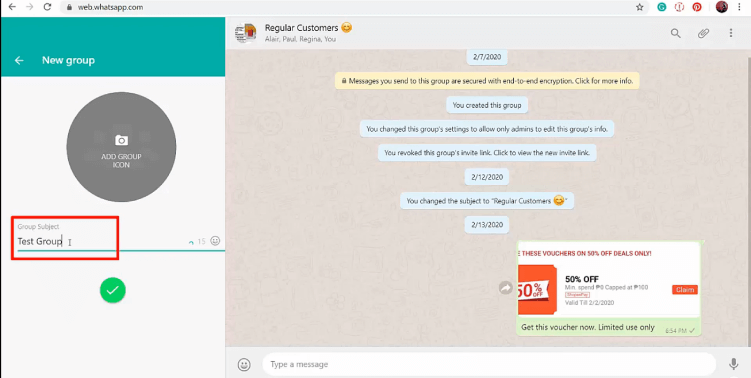
Add a group icon, and the group name.
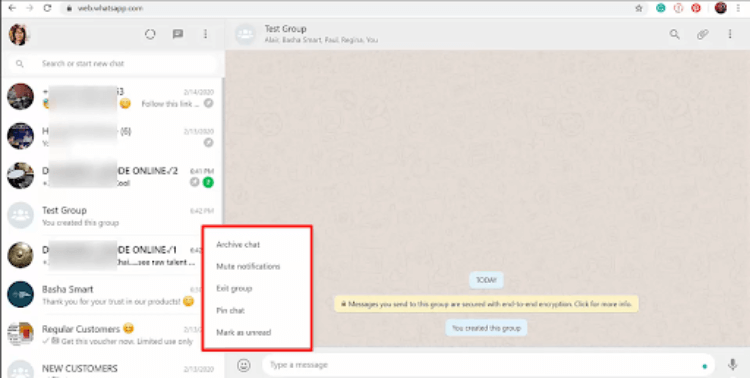
You can archive chats, mute the notifications, exit group, pin chats, or mark them as unread.
#2 Pinning Chats
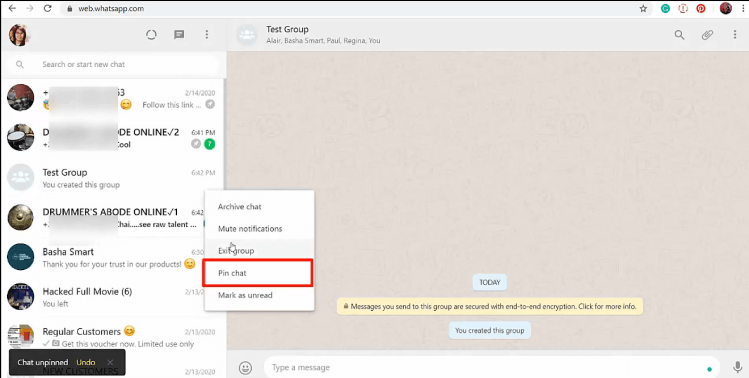
Pinning chat is a useful feature. On pinning a chat, it will always be on the top of the chats. This feature is helpful when you receive many messages every day, and you want an important conversation to appear on top of the existing chats. This way, you won’t have to scroll down the chats or use the search box to look for a chat. You can pin personal chats as well as group chats. Users can have only three pinned chats in WhatsApp at any instant.
Pinning chats on WhatsApp is easy, and requires only one step.
To pin a chat, click on Pin Chat.
If there exist three pinned chats already, you will need to unpin the existing chats first.
#3 One-to-One Chats
You can send one-to-one chats using WhatsApp Web. Doing so will save your time in having to reach your mobile phone to send messages to your customers while working on your computer.
#4 Quick Replies
Quick reply is one of the messaging tools available on WhatsApp Business using which you can send predefined messages to their customers. This tool is particularly helpful when you mostly receive similar questions about your products/services.
If you have set up quick replies on your mobile app, you can send these predefined messages to your contacts on the Web app, not just on the mobile.
To access quick replies, type the slash key / and a list of predefined messages that you have created will be displayed. Choose one of these quick replies and click on the send button.
You can change these quick replies at any time by accessing the settings.
#5 View Your Status and Contacts’ Stories
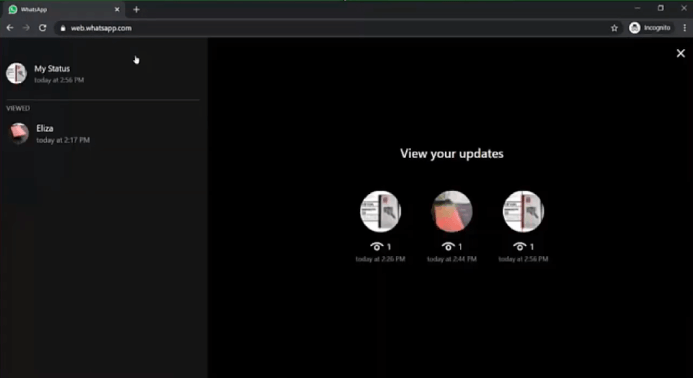
Click on the Status icon on the top of the search box in WhatsApp Web to view your status update as well as others’.
On the right side of the screen, you can view the stories’ thumbnails, and the number of people who viewed it. Below the Viewed tab are listed your contacts’ stories. Tap on them to view the stories.
Remember that if you have disabled the Read Receipts, you cannot find out who has viewed your story among your contacts Additionally, your contacts cannot know either whether you have viewed their story or not.
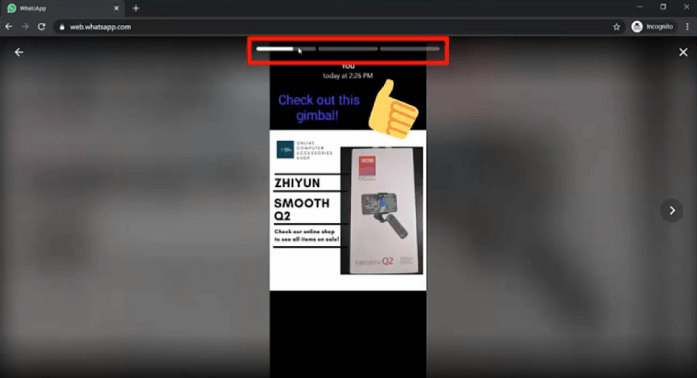
Tap on the thumbnail of your stories to view them. Your customers can reply to your stories and inquire about your products/services.
Viewing All Active Sessions Of WhatsApp Web
Open WhatsApp on your phone. Tap on WhatsApp Web.
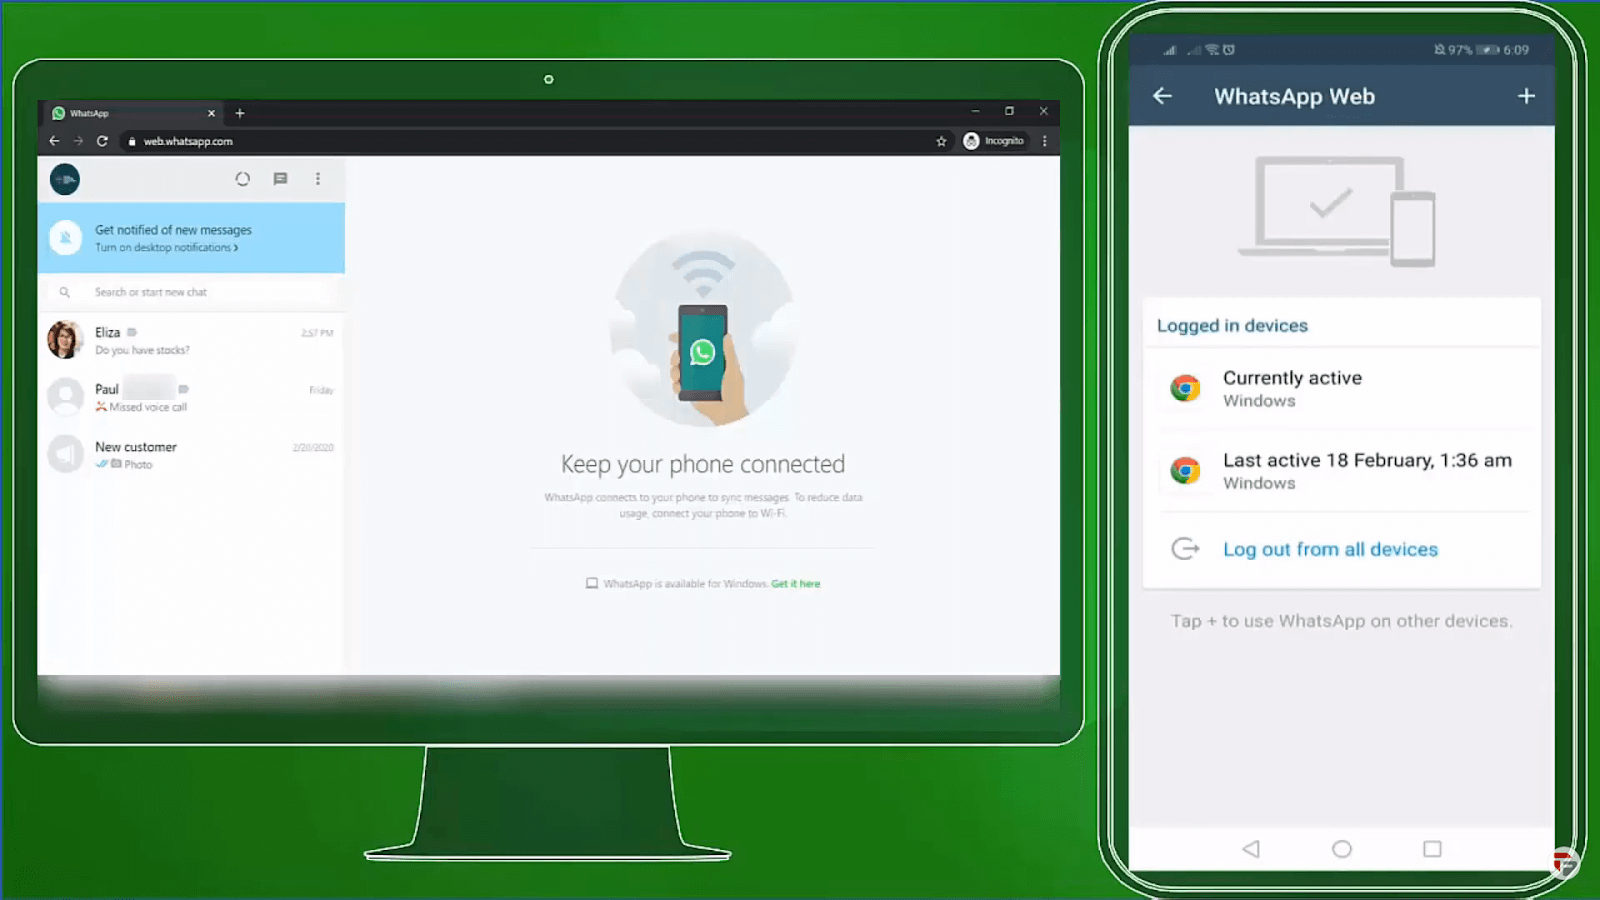
Here you can view all your logged-in devices. If you are currently using any of these devices, WhatsApp will display that device as being active.
The page will display details of your last active sessions along with the time, date, and the operating system.
WhatsApp Web continuously syncs with your mobile app. Hence, at any time you log in WhatsApp Web, the session’s details will be displayed here. Further, WhatsApp will send a notification to your phone whenever any web client is active on your browser.
You can log into WhatsApp Web in more than one device. To add another device, tap on the + icon.
If you want to log out of all WhatsApp Web sessions, tap on Log out of all devices. Next time you will have to scan the QR code once again to use WhatsApp Web.
That’s it, folks!!! We have successfully learned how to use WhatsApp Web on your computer. Hope you found the lesson helpful. In the next lesson, we will discuss how to get leads and sell products using WhatsApp Stories. Stay tuned!!!